L E D Tutorial

Adding LEDs can really take a costume to the next level. To start, you will need the following items, most of which can be found at any local Radio Shack or ordered online:
- Hot Air Gun
- Shrinking Hose
- Soldering Gun
- Solder
- Wire
- LEDs
- Batteries
- Wire Cutter or knife
- Resistors
- Switches

The next step is to add some shrinking hose to the isolated wires. It's purpose is to keep the wires separated. Make sure you use enough of the hose to cover up the entire exposed wire because we don't want them touching later on.

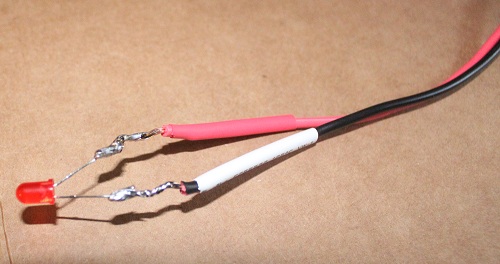
Please take note that on each LED, there are both a long and a short leg. The short leg is for the negative wire, which would be the black one. And of course that would leave the long leg for the positive, or red wire. Now, making sure you match the correct wire with the correct leg, solder them together.
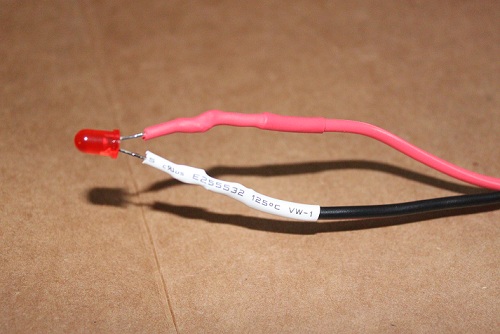
Next we take the shrinking hose that was placed over the wire earlier and move it up the wire and over the soldered part. Now take your hot air gun and (being careful not to burn yourself) heat up the hose and it will shrink around the wire.
Now that the LED is in place, you will want to check to see how long you need your wire to be. Cut the wire where you need it to be and once again strip the rubber off of the end of the wire. We're almost done! The next step involves a little bit of ground work. We need a resistor to kill the extra volts in our battery since this tutorial is only for one LED at a time, and too many volts can burn out the LED very quickly. I Used a resistor calculator which can be found here to figure out exactly what I needed. But there are many more calculators available online if this one is not to your liking. Once you have your resistor, solder it to the end of the negative (black) wire and add some shrinking hose to it, but don't shrink it yet because we have one more connection to make.

Next grab your battery box/clip thing and solder the negative wire to the other end of the resistor and proceed to shrink the hose around the whole resistor to make sure it is isolated well.

The final thing to do is attach the switch that allows you to power on the light! I used a three pole switch to take care of the job. Once again using your soldering gun, solder, and shrinking hose combination, solder the red wire from the battery box to the center pole. And then solder the red wire from the LED to one of the side poles, leaving the third and final pole untouched. It doesn't matter which pole you leave untouched.

Now attach your power source, I used a 9v battery, flip the switch and let there be light!!!

I hope this tutorial was easy enough to understand! If anything was unclear, or if you have any questions or requests for future tutorials, please send us an email at [email protected]
If this tutorial was helpful please like us on facebook to keep up with our upcoming costumes!
If this tutorial was helpful please like us on facebook to keep up with our upcoming costumes!
